How To Install An In Ground Trampoline
How To Install An In-Ground Trampoline
In-ground rectangle trampolines are great if you have a scenic view you wish to protect from the obstruction that a safety net can be, or if you live in a high wind area and want to further minimize the risk of a trampoline blowing away or the users simply enjoy the ground level access.
A bonus of a rectangle in-ground trampoline over a round in-ground trampoline is that the hole digging, and the retaining walls is a lot simpler to build for the rectangle shape with nice straight sides and no curves!
IMPORTANT NOTES
The In-Ground trampoline does not come with a net enclosure because the trampoline use is intended to be at ground level. If you decide to use an In-Ground trampoline above ground instead of installing it in the ground, then basically you have a trampoline without the safety protection of net enclosure. Parkour and Free Running users like to transition on and off different heights utilising all sorts of objects including a netless trampolines above ground, however it’s not recommended due to the inherent risk and potential severity of injury due to the extra falls distance.
The GeeTramp frame is designed for all the frame and full height of the legs to be assembled while remaining independent from the retailing walls. This enables the unique bounce experience as well as preserving the long life of the components. This means the trampoline is not to be physically attached to the retaining wall. The three methods below are discussed for full market context however note that the GeeTramp design is only suitable for two of these methods.
View to Buy an In-Ground-Trampoline
 Who Installs In-Ground Trampolines?
- Local Landscaper
- Handyman
- If you're handy, you can do it yourself
 Why Install a Trampoline "In-Ground"?
Some people have a preference to have their trampoline installed at ground level, here are some of their reasons:
- It simply looks good
- They have easier access to the trampoline
- It can fit in with backyard and landscape design
- There are fewer obstructions in the backyard to spoil the view
- The wind has a lot less chance to blow the trampoline away
- There is a perceived increase in safety, as there is less distance to fall and trampoline can't tip over
 How Is It Done?
There are quite a lot of blogs and articles about how to build your own in-ground trampoline. Having not built one in ourselves we don't feel qualified to say any more on the topic other than what many of our customers have fed back to us what they have done.
Here are some techniques used:
- Frame-mounted on top of a retaining wall (Do NOT use for GeeTramp)
- Retaining wall built around an above-ground trampoline
- Complete trampoline installed into a hole in the ground
.png) Important things to think about before installing an In-Ground Trampoline:
Important things to think about before installing an In-Ground Trampoline:
- Local government requirements
- Soil type
- Retaining wall
- Drainage
- Getting the hole and retaining wall sizes right
- Note: The trampoline frame sizes listed on our website are for naming the generic size of a trampoline and should be treated as a ballpark reference only, these nominal sizes should not be relied upon when digging the actual hole or for making the retaining wall. For our rectangle range, the long side rail bow’s out a little by design which needs to be factored in. Depending on the installation method you choose, you may also need to allow for an air flow gap. When sizing up to make the hole or retaining wall it is strongly suggested you already have the trampoline with the mat and springs assembled so you can then directly measure off the "actual" assembled product dimensions.
FRAME MOUNTED ON RETAINING WALL (No Legs)
(Do NOT Use this method for GeeTramp)
FRAME INSTALLED IN-GROUND
This is a Suitable method for GeeTramp
RETAINING WALL AROUND TRAMPOLINE
This is a Suitable method for GeeTramp
Pros And Cons Of An Inground Trampoline
Below we have outlined a few positives and negatives that can come from installing/having an inground trampoline......
|
Positives |
Negatives |
|---|---|
|
Simple construction and assembly |
Drainage can be an issue for the garden |
|
Can revert trampoline back to above-ground style |
The cost of inground installation can be expensive |
|
The trampoline frame is still free to flex as designed enabling longer life of components |
If you want to remove the trampoline in future, you will need to fill the hole |
|
The trampoline can be removed for any maintenance of the pit, retaining wall or trampoline |
Trampoline legs can sink into the dirt over time (needs to have stable base on legs) |
|
Retaining wall looks after all the soil-related forces |
|
|
Keeps trampoline and retaining wall separated |
|
|
Trampoline looks after all the jumping forces |
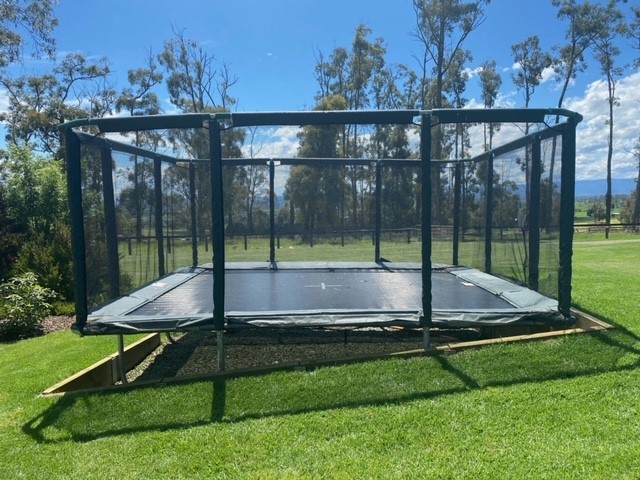
TRAMPOLINE FRAME INSTALLED INGROUND
This is suitable for the GeeTramp frame design.
Customers have dug a hole and then simply placed the trampoline with its legs into the hole.
For this type of installation, here is the list of materials you will need and how long it will take:
Materials:
30 x Treated Pine Sleepers (200mm x 75mm x 3 meters)2 x Treated Pine Posts (100mm x 100mm x 3 meters)1 x Large Box 100mm Galvanised Flat Head Nails1 x Tennis Ball7m x 5m Weed Matting
Timeframe:
FRAME MOUNTED ON TOP OF THE RETAINING WALL
This is NOT suitable for the GeeTramp frame design.
For this style inground you need to dig a hole, provide some form of drainage to the hole, build a retaining wall the size of the trampoline frame and then secure the frame onto the retaining wall.
This makes the height of trampoline more stable (less likely to sink). It is a simple layout, as it has the least amount of trampoline parts required.
Please note: The retaining wall needs to be stronger than the original frame as it will now be taking all the stress from bouncing. There will need to be some sort of airflow system from under the trampoline.
IMPORTANT NOTE: this design may suit some other brands on the market however we do not recomend this for the GeeTramp design, this is because the frame (especially the long side needs to be free to flex when being jumped on, the legs are also required as they assist the frame for power flexing for the bounce experience.
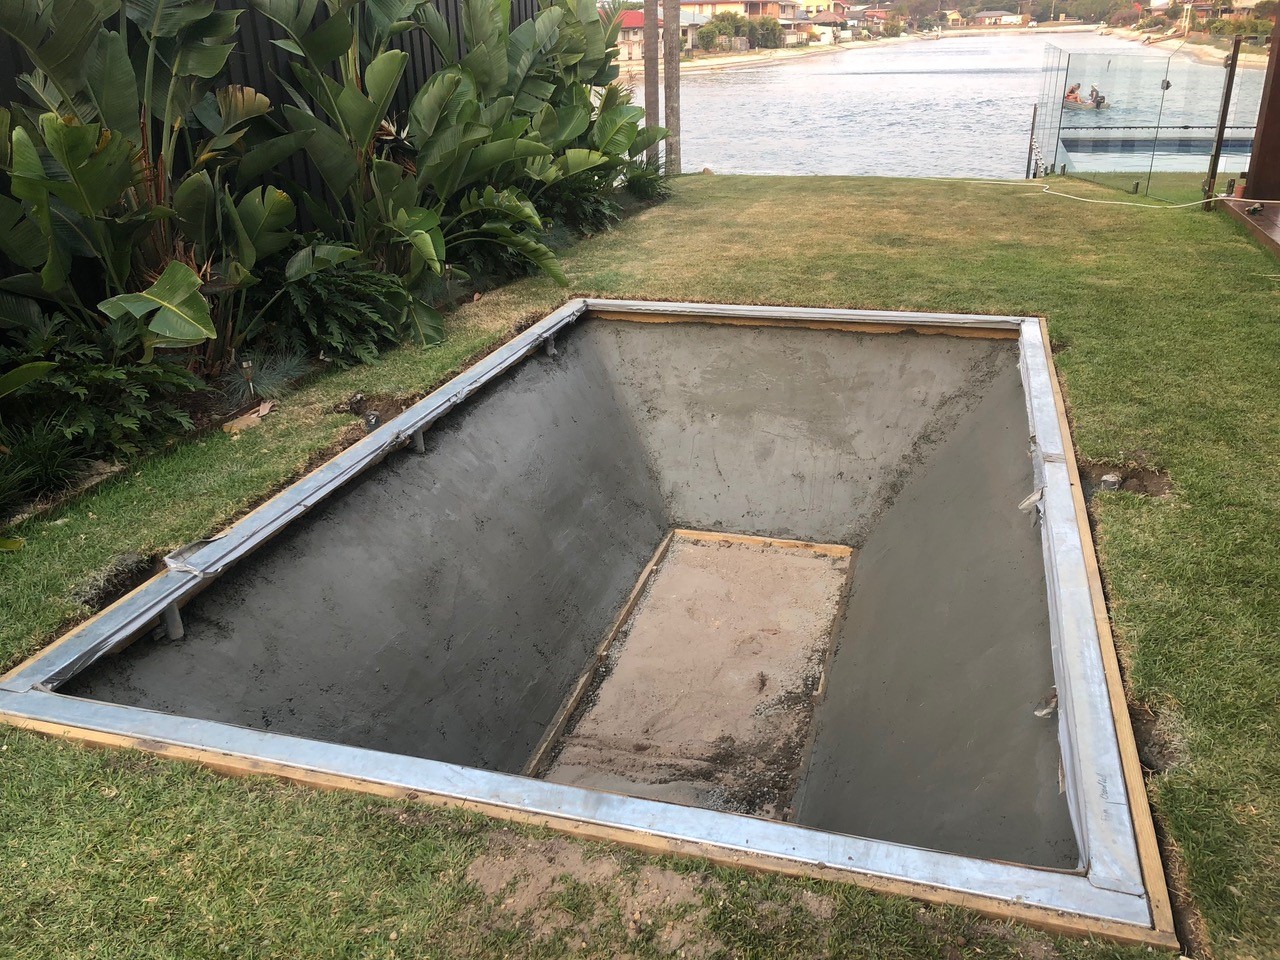
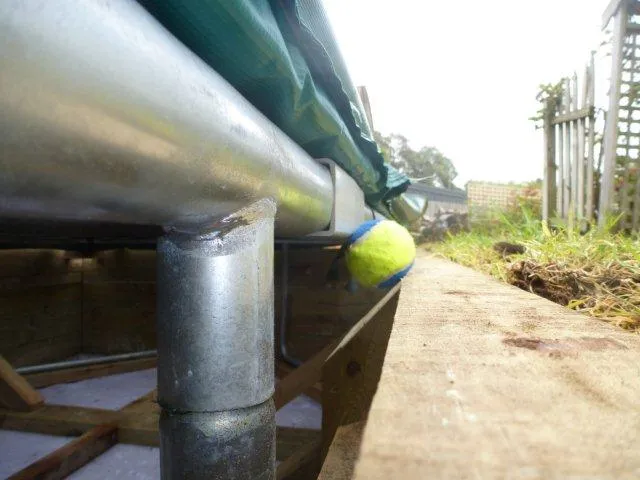
First Picture:
-
Hole prepared with retaining wall
-
Not visible is the drainage system
-
Allow for airflow from the trampoline
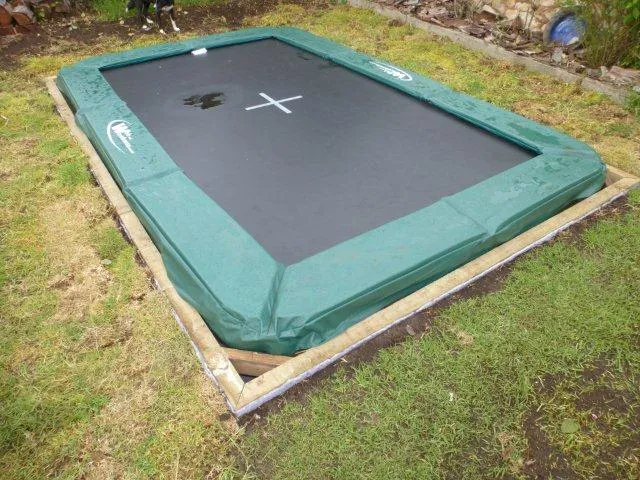
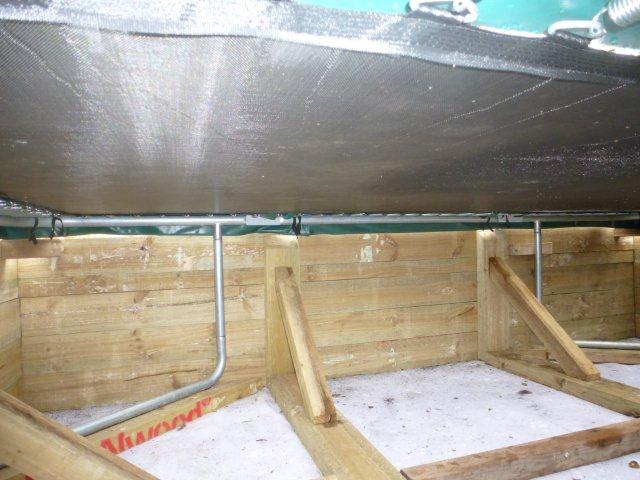
Second Picture:
-
Mat secured by springs (underneath pads)
-
Pads secured in place on frame
-
Frame installed around retaining wall
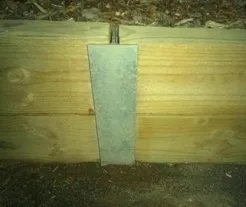
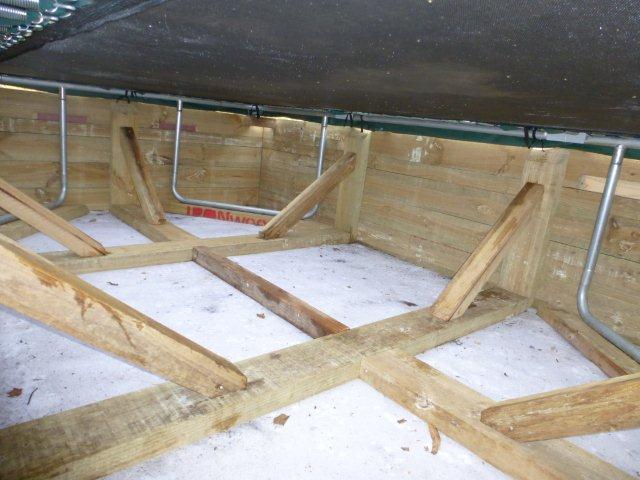
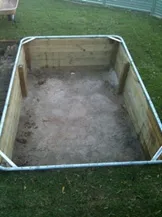
Third Picture:
-
Retaining wall H section post
-
Retaining wall vertical posts to secure retaining wall
-
"H" Galvanised Steel post secured into the hole then set with concrete
RETAINING WALL BUILT AROUND TRAMPOLINE
This is suitable for the GeeTramp frame design.
This method uses a retaining wall built above the ground, to then put the trampoline inside the retaining wall.
Positives:
- Easier to set up a drainage system
- Possibly easier to revert backyard to original condition
- The trampoline can easily revert to above-ground style
Negatives:
- Need to move a lot of dirt,
- Need to build a strong retaining wall
Tips and Considerations:
*Please contact your local council to inquire if a permit is required in your area.
The hole and retaining walls need to be prepared with the following in mind:
- The base needs to be firm enough to prevent the trampoline from slowly sinking over time.
- The hole can become a receptacle to hold water. You will need to provide adequate drainage either by utilising gravity (e.g. compacted screenings with drainage pipes) or via a dedicated drainage pit with a sump pump.
- The base soil content can vary. Some soils are relatively inert, however some can attack the galvanised coating and steel. Its advisable to keep any trampoline steel framework insulated from the base soil, this can be done with compacted screenings.
- The depth of the hole needs to be adequate to provide any user sufficient clearance during a high load bounce. A safe rule of thumb is to allow the same depth equivalent to what the above ground trampoline has in height off the ground.
- Airflow under the trampoline needs to be considered. When a trampoline is above the ground it’s not noticeable how much air is actually pushed down and outwards, because the framework is very open to the atmosphere.
Methods you can use to overcome restricted airflow when installing an in-ground trampoline:
- You can have the top of the frame raised above ground level a little bit, depending on trampoline size, approximately 50 - 100mm air gap is required.
- You could provide a system of air vents from under the trampoline to the atmosphere by drainage pipes or ducting.
- You could remove the spring pads but this takes away a mandated safety feature, so this is not recommended.
Note:
The trampoline frame sizes listed on our website are for naming the generic size of a trampoline and should be treated as a ballpark reference only.
These nominal sizes should not be relied upon when digging the actual hole or for making the retaining wall. For our rectangle range, the long side rail bows out a little by design which needs to be factored in.
Depending on the installation method you choose, you may also need to allow for an airflow gap. When sizing up to make the hole or retaining wall, it is strongly suggested you already have the trampoline with the mat and springs assembled so you can then directly measure off the "actual" assembled product dimensions.
Feedback
We love to see how our customers have gone about installing their trampoline, the pitfalls they have come across and any other constructive tips we can share with others. We welcome your results, stories, photos and videos, please send them to us.
{trampoline_selector_button}